
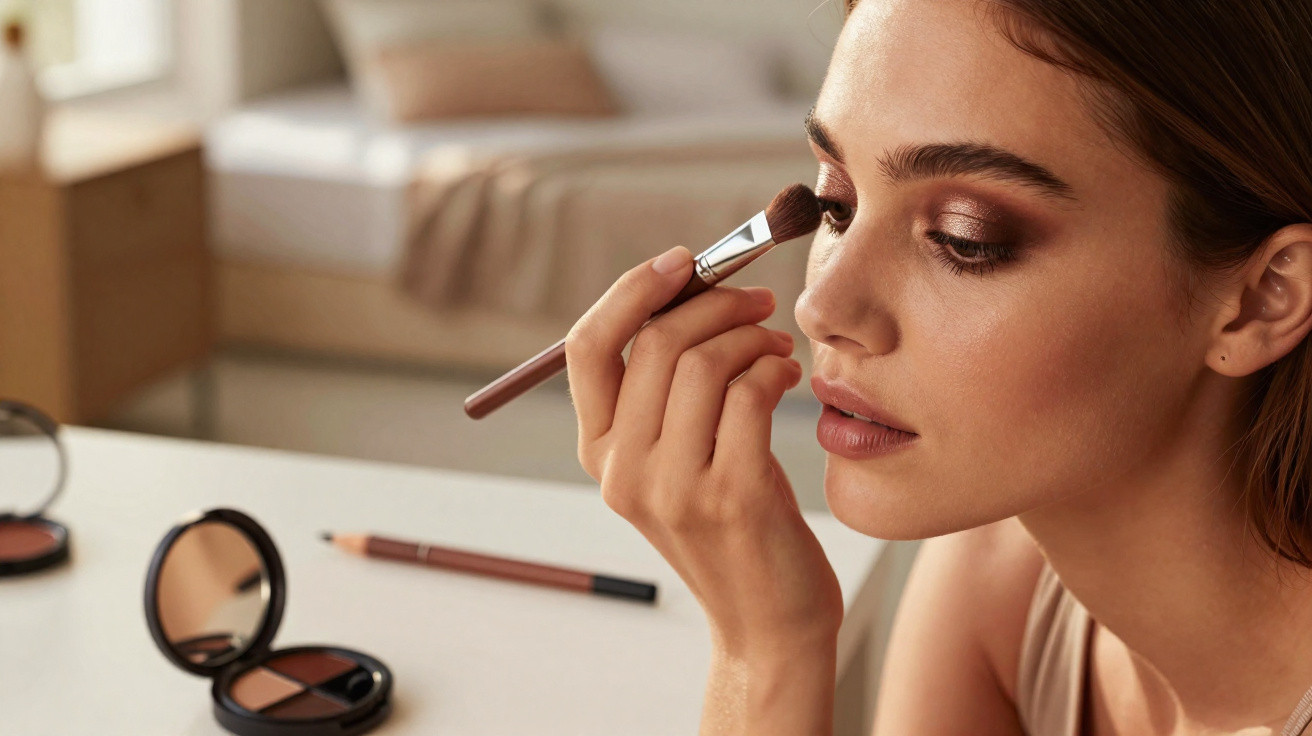
The brown smoky eye look is everywhere in 2026.
Whether it’s your Insta feed, TikTok, or a dinner date, the brown smoky eye look has quietly become the default routine. Instead of harsh black, more and more professionals are reaching for soft brown tones that define the eyes without looking severe. Make-up artist Charly Salvator explains how to build it step by step - and where most people go wrong.
Why everyone is suddenly wearing brown smokey eyes
A classic black smoky eye can look intensely dramatic, and sometimes tougher than you intend. Brown behaves differently: the gaze stays striking, but the overall finish reads softer and more natural. That fits the current trend - understated skin and lips, with the eyes doing the talking.
"A brown smoky eye look makes the eye appear larger, emphasises the iris and still feels elegant and wearable for everyday life."
This effect suits almost every eye shape and skin tone. Fair complexions tend to look best with warm caramel and milky-coffee shades, while deeper skin tones are flattered by rich chocolate or mocha browns. That’s exactly why the look is so in demand: one framework that can be tweaked in a few simple moves.
The base: without a creamy foundation, the look turns patchy
Charly Salvator never begins with powder eyeshadow. His rule is simple: apply a light, neutral cream base across the entire mobile lid and slightly beyond. This can be a dedicated cream eyeshadow, a tinted eye primer, or even a skin-toned concealer.
- Function: evens out discolouration on the lid
- Benefit: makes eyeshadow far easier to blend
- Extra plus: improves wear time dramatically and helps prevent creasing
He taps the cream on with a fingertip or a flat brush, then immediately softens the edges using a fluffy brush. The transition into the surrounding skin should be invisible - this is the moment that determines whether the finished look will read polished.
The core look: blending brown cream eyeshadow properly
Next, a brown cream eyeshadow goes on. Quantity matters: start with less, then build in layers. Place the colour on the mobile lid, then pull it upward and outward.
How to create the soft, smoky effect
Charly focuses the intensity on the outer corner. If your lids are slightly hooded, he recommends following an imaginary diagonal line towards the temple rather than sticking rigidly to the natural crease - it creates a more lifted impression.
Blending is the make-or-break step:
- Place the cream eyeshadow in the centre of the lid.
- With a clean, fluffy brush and no pressure, blur it upwards and outwards.
- Under the eye, sweep a whisper of colour along the lower lash line using a small brush.
This creates the signature frame around the eye that makes the look appear bigger. The edges should never look sharp - otherwise the whole “smoky” idea disappears.
Pencil work: brown and black kohl for extra depth
Now it’s time for an eye pencil. Charly starts with a brown kohl along the upper and lower lash lines. The line doesn’t need to be perfect - in fact, the point is to smudge it afterwards with a small brush or a cotton bud.
"An imperfect kohl line that’s blended with care ends up looking more professional than a hard, precisely drawn line."
For maximum depth, he then applies a black kohl directly to the waterline on the inside of the eye, taking it right into the inner corner. He softens the edges slightly so the eye doesn’t appear smaller. If your eyes are very small, he suggests using a deep brown or taupe on the waterline instead.
Setting with powder eyeshadow: the step many people skip
Cream products deliver intensity, but they need setting so they don’t slide. That’s where medium and deep brown powder shadows come in.
The ideal combination of two brown shades
Charly constructs the look using two tones:
- Deep chocolate brown: placed on the outer area above and below the eye, close to the lash line, then gently blended upwards
- Medium brown: swept over the mobile lid and softly diffused over the boundary of the darker shade
The result is a gradient: strongest colour near the lashes, fading into a softer haze towards the crease. This technique gives that hallmark depth without any visible “start and finish” to individual colours.
Cleaning up and highlighting: the professional finishing touches
To finish, Charly uses a touch of concealer or cover cream under the eye. This removes any fallen pigment and, if needed, subtly lifts the outer edge of the smoky eye. The eye looks fresher and the overall shape cleaner.
A light shade - matte or with a soft satin sheen - placed beneath the highest point of the eyebrow opens up the eyes further. The emphasis should stay restrained; a strong glitter stripe can quickly look dated.
Then comes mascara on both upper and lower lashes. If you want extra drama, build it in several thin coats rather than one thick layer. Clumpy lashes can make an otherwise refined eye look appear messy.
Which lips work with it - and what ruins the look
With a brown smoky eye, Charly recommends keeping lips simple: a clear balm, a gentle nude, or a slightly glossy finish. The idea is that the eyes lead and everything else stays quiet. A bold lipstick paired with heavily emphasised eyes can feel overloaded and takes away the modern softness.
| Look | Lip choice | Effect |
|---|---|---|
| Everyday | colourless balm | fresh, unfussy |
| Date night | nude gloss | lightly glamorous, soft |
| Evening event | rose-toned lipstick | elegant, but not “too much” |
Who the brown smoky eye look is ideal for
This method works for round, almond-shaped and deep-set eyes - what matters is adjusting the shape. Round eyes suit an outward, slightly angled blend. With narrow eyes, it helps to keep the lower lash line very subtle so the gaze doesn’t look smaller.
If you wear glasses, brown has an advantage: it competes less with frames and still reads soft behind lenses. If your eyes are sensitive, choose well-tolerated, waterproof pencils so nothing smudges.
Typical mistakes - and how to avoid them
Most problems come down to small details that are easy to fix:
- Too much product at once: apply in thin layers and build gradually.
- No seamless transitions: keep a clean, dry brush solely for blending.
- The wrong shade: very ashy browns can make you look tired, while overly red browns can mimic under-eye circles - when in doubt, check the colour in natural daylight.
If you’re not confident yet, begin with a softer version: a little brown kohl, gently smudged, plus mascara. From there, you can take it step by step towards a full smoky eye.
The effect is also interesting with different eye colours: brown enhances blue and green eyes particularly strongly because the contrast feels warmer than black. With brown eyes, the result is cohesive and very elegant - a real advantage for evening occasions.
With a bit of practice and the right structure of cream and powder textures, the brown smoky eye look quickly becomes a dependable go-to - whether it’s for the office, the bar, or a bigger weekend moment.



Comments
No comments yet. Be the first to comment!
Leave a Comment