
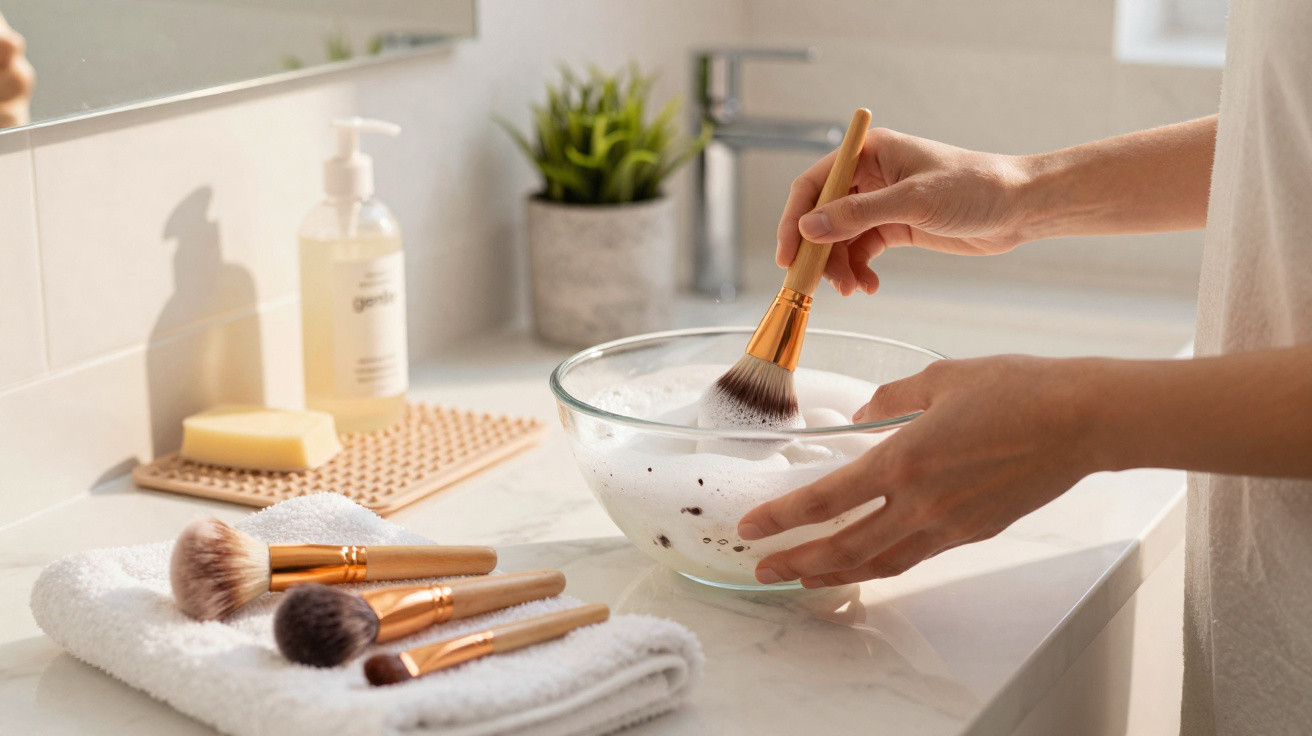
The basin is overflowing before the first brush even meets the ceramic.
Beige streaks of foundation unfurl through the running water, and a faint, stale-product smell lifts as the bristles turn darker. You press, swirl, rinse, repeat - yet the water never quite runs clear. Somewhere between a slow drain and a blush brush that still looks dingy, a quiet thought clicks into place: you’ve been cleaning them wrong for years.
You rewind to where you first “learned” how to wash makeup brushes. A random YouTube tutorial. Your best mate’s baby-shampoo “hack”. The wedding makeup artist who half-laughed that your kit was a health hazard. You laughed too.
But tonight, watching that cloudy water disappear, it doesn’t feel like a joke. Because what sits inside your brushes isn’t only colour.
The dirty secret hiding in clean-looking brushes
From the outside, makeup brushes rarely look truly disgusting. Maybe the handle feels a bit tacky, maybe the bristles have started to fan out - but nothing that screams disaster. Then you angle one under the light and spot it: a compact, stubborn ring of product packed right up near the ferrule, the metal band that holds the hairs in place. It’s as if the brush is wearing a tiny, dusty roll-neck made of old makeup and skin.
The bigger issue is what you can’t see. Between the fibres sit skin oils, bacteria, setting spray, pollution, and whatever your face encountered that week. A brush turns into a shuttle: cheek to bronzer to powder, carrying microscopic leftovers with every pass. On the surface you get “fresh” makeup. Underneath, it behaves more like a slow, steady skin sabotage.
Dermatologists know this - quietly. Many will admit off the record that dirty brushes often play a supporting role in breakouts, rough texture, and irritation that seems to arrive “for no reason”. What almost nobody does is clean brushes the way professionals actually do it: properly, right down to the base.
A London-based makeup artist once told me she can guess how someone cleans their brushes just by the way the bristles spread. “People wash the tips,” she said, “not the roots.” She wasn’t wrong. Scroll through a Sunday-night “self-care” TikTok and you’ll see the pattern: a quick swirl on a cleansing pad, a bit of lather, a rinse, done. It looks satisfying on camera. It isn’t the whole job.
One brand asked its customers about their habits and found that more than 60% cleaned their brushes less than once a month. Nearly a quarter said they couldn’t even remember the last time they’d done it. Those same people are often meticulous about expensive skincare - and then wonder why their skin texture never improves.
On a backstage fashion-week job, I watched assistants wash 40, 50 brushes in a row with a calm, almost clinical routine. Each one was soaked, squeezed, reshaped, and laid flat like a tiny sleeping battalion. None were left damp at the base. None were stood upright to dry. That was the moment the difference between at-home habits and pro standards really landed.
The reasoning behind the “right” method is straightforward, even if it clashes with what most of us do casually. A brush isn’t just bristles. It’s bristles + glue + ferrule + handle. Most people go at the hairs and ignore the rest. Repeated half-washes push product deeper towards the root, where it combines with moisture and slowly weakens the glue. That’s why your favourite brush eventually starts shedding like a nervous cat.
The better approach starts with a different question: not “How do I make this look clean?” but “How do I stop creating a damp, product-stuffed cave at the base of every bristle?” Once you frame it like that, a quick swirl on a silicone mat feels like washing half a plate and putting it straight back in the cupboard.
The pro-level routine no one taught you
The step most people skip begins with something unglamorous: lukewarm running water and a bit of patience. Keep the brush angled downwards - bristles pointing into the sink - and let the water run over the tips only. You don’t want water pouring into the ferrule. That’s where the glue is, and when it fails, the brush follows.
Then put a pea-sized amount of gentle soap or a dedicated brush cleanser into your palm. A mild, low-fragrance washing-up liquid can work remarkably well on synthetic brushes, especially those used with oily products; for natural hair, a gentle shampoo is usually better. Swirl the brush in small circles with light pressure - enough to flex the bristles, not enough to splay them out.
Next comes the move nearly everyone misses: run your fingers from the base towards the tip, as if you’re “milking” the brush. This is what pulls the build-up out from the roots rather than just foaming up the surface.
Rinse until the water runs clear, still keeping the brush pointing down. If you’re dealing with heavy foundation or cream products, do another pass. For eye brushes that have touched eyeliner or intense pigments, an extra tiny drop of soap is worth the time. And when you’re convinced it’s clean, do one more gentle squeeze close to the base - the water that comes out is the honest part.
Let’s be honest: nobody truly does this every single day. Most people keep postponing until their bronzer brush looks like it’s survived a sandstorm. That’s why it helps to swap the mindset from “I must clean everything constantly” to “I’ll rotate smaller batches often enough to stay on top of it.”
Split your brushes into groups - face, eyes, detail - and choose one group per week. Face brushes that touch liquids or creams need the most frequent deep cleans. Eye brushes that go near lash lines or gel liners can be quiet culprits for irritation, so put them next. Powder-only brushes are more forgiving, but they still collect oil and dust over time.
There’s also a side people rarely admit: the emotional friction. On a rushed morning, you reach for your favourite brush and feel that stiff, crusty layer at the tip. It’s a tiny snag in the day - a small reminder of everything you meant to do and didn’t. Cleaning them properly, once, can feel oddly satisfying, like clearing an overfilled inbox.
“Clean brushes won’t replace a good skincare routine,” says one New York dermatologist, “but they will stop your tools from fighting against it. You’d be surprised how many ‘mystery’ breakouts calm down when people finally wash to the base.”
To stop the routine feeling like a punishment, make it a small sensory ritual: warm water, soft foam, the quiet rhythm of swirl and rinse. Lay a clean towel out flat, squeeze out the excess water, then reshape each brush with your fingers. Dry them horizontally, with the bristles slightly over the edge of a counter so air can circulate.
- Never dry brushes upright in a cup: water seeps into the ferrule and loosens the glue.
- Avoid boiling water or harsh alcohol baths: great for instant “disinfection”, terrible for longevity.
- Use a quick-dry spray only for in-between cleans, not as a long-term replacement.
- Wash sponge blenders separately; they need deeper cleansing and longer drying time.
- Stop twisting or yanking bristles when drying; it distorts the shape permanently.
What changes when you finally do it right
The first time you use a brush that’s genuinely clean - cleaned all the way down, not merely rinsed - you notice a difference. Foundation glides rather than dragging. Bronzer blends without that patchy, stubborn fight. Highlighter lands where you intend it to, instead of grabbing onto invisible residue left behind by last week’s cream blush.
Your skin responds too, though it’s not always dramatic. Sometimes it’s simply fewer new bumps along the jawline. Less random redness across the cheeks. The faint roughness on your forehead easing over a few weeks. You won’t wake up with glass skin overnight, but you will stop quietly reapplying bacteria every morning with tools that never properly got clean.
There’s something grounding about it as well. On a Sunday evening, with the telly murmuring in the background, you line brushes up on a towel like little soldiers drying after a battle. It’s ordinary, and slightly meditative. And once you’ve seen the sludge that comes out of the base of a supposedly “clean” brush, it’s difficult to return to quick, half-hearted swirls.
At some point, anyone who loves makeup meets that guilty drawer or dusty cup of brushes that look like they came from a backstage clearance five years ago. On a good day, you promise you’ll “deal with them soon”. On an exhausted day, you grab the least grubby one and pretend it’s fine. On a brave day, you turn on the tap, line them up by the sink, and learn the right way at last - the slow, thorough way most people never do.
| Key point | Detail | Why it matters to you |
|---|---|---|
| Angle and water | Always wash bristles facing downward with lukewarm water, never soaking the ferrule. | Protects glue, prevents shedding, extends the life of expensive brushes. |
| Cleaning at the base | Gently “milk” from ferrule to tip to remove buildup rooted deep inside. | Reduces bacteria, improves blend, limits breakouts and irritation. |
| Drying and cadence | Lay brushes flat to dry, grouped by type, on a weekly rotation. | Makes cleaning realistic, less overwhelming, and easy to keep as a habit. |
FAQs
- How often should I really wash my makeup brushes? Ideal is once a week for face brushes used with liquids or creams, every one to two weeks for eye brushes, and every two to three weeks for powder-only brushes. If you’re acne-prone or easily irritated, aim for the more frequent end.
- Can I just use baby shampoo or hand soap? Yes - provided it’s gentle and not strongly fragranced. Plenty of pros use mild washing-up liquid on synthetic brushes that touch greasy products, and a soft shampoo for natural hair bristles. Strong detergents and heavy perfumes can dry them out.
- Are quick-dry brush sprays enough on their own? They’re useful between deep cleans or for fast colour changes, particularly for eye brushes, but they don’t remove the build-up that sits deep in the base. Treat them as a surface reset, not a substitute for water-and-soap washing.
- Why do my brushes start to smell weird over time? That faint musty, “old makeup” smell is usually trapped product, skin oils, and moisture lingering at the root of the bristles. It’s a sign the brush isn’t being cleaned fully, or it’s drying too slowly in a damp space.
- How long should I keep a makeup brush before replacing it? With regular deep cleaning and careful drying, a good-quality brush can last for years. Replace it when it sheds heavily, won’t hold its shape even after washing, or feels rough and scratchy on the skin despite being clean.





Comments
No comments yet. Be the first to comment!
Leave a Comment