
Few things spoil the satisfaction of a fresh manicure like seeing your nail polish chip right at the very tip just a couple of days after you applied it. The good news is that a straightforward technique can completely change that outcome.
The weak spot that ruins even the neatest manicure
The free edge of the nail is the part that takes the most punishment day to day. Typing, opening packaging and even washing your hands create tiny knocks that, over time, weaken the layer of nail polish sitting on that edge.
Because this section isn’t anchored to the nail bed, it flexes more and can lose adhesion easily. Regular contact with water and hand sanitiser gel only speeds up the peeling and chipping.
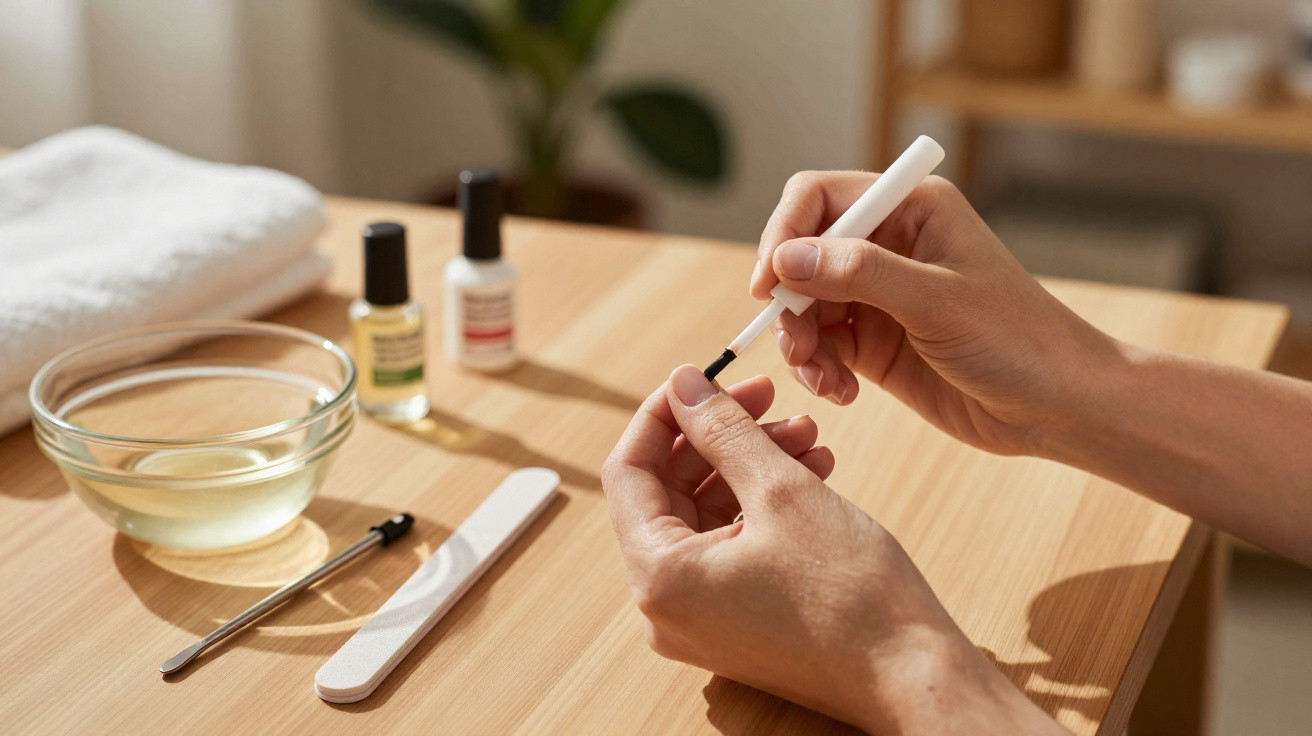
- Sealing the tip: sweeping the brush across the nail’s edge helps stop chipping from starting at the most vulnerable point.
- Strengthening base coat: provides a tougher foundation for the colour layers.
- Drying time between coats: waiting properly helps prevent bubbles and early cracking.
- Top coat refresh: reapplying the top coat every two or three days extends shine.
- Cuticle oil: keeps the surrounding skin hydrated and helps prevent lifting at the sides.
One extra step that changes the final result
In practical terms, the trick is to paint the freshly cut edge of the nail-not only the top surface-at every stage of polishing. That small action forms a kind of capsule that wraps the tip completely.
Doing the same motion with your base coat, your colour and your top coat means your manicure stands up far better to everyday contact. It’s a tiny adjustment, but you’ll notice it when you’re holding a mug or tapping on your phone.
Prep details nobody notices, but that make a difference
Before you apply any nail polish, the nail needs to be clean and totally dry. Natural oils or leftover hand cream can reduce grip without you realising.
The prep routine that shields your nail polish
Three steps before you even open the bottle
Wash your hands with soap, then wipe each nail with cotton wool and alcohol to remove any oily residue that could interfere with adhesion.
Choose rounded or oval shapes, which spread daily impact more evenly, and use a fine-grit file to give the nail surface a light texture.
Nail shape also affects how long polish lasts. Square edges concentrate force at the corners, while rounded contours help distribute pressure in a more balanced way.
Why this matters for anyone doing their nails at home
If you do your own manicure, you know how deflating it is to watch a whole evening’s effort chip within two or three days. Sealing the tip significantly cuts that frustration without costing anything extra.
The payoff is polish that lasts longer between touch-ups, saving you time, product and that feeling of starting again from scratch every week.
Products that help your nail polish last longer
More elastic nail polish formulas and quick-drying top coats move better with the nail’s natural flex. And when you top up the top coat every few days, the protective layer stays consistently active.
In the end, looking after your nails is about more than the colour you pick. A set of small habits-from prep to sealing the tip-is what decides whether your manicure stays glossy for days or breaks down in hours.
If this tip helped you understand why your nail polish was chipping so quickly, share it with someone who’s always redoing their manicure every week.
Comments
No comments yet. Be the first to comment!
Leave a Comment