
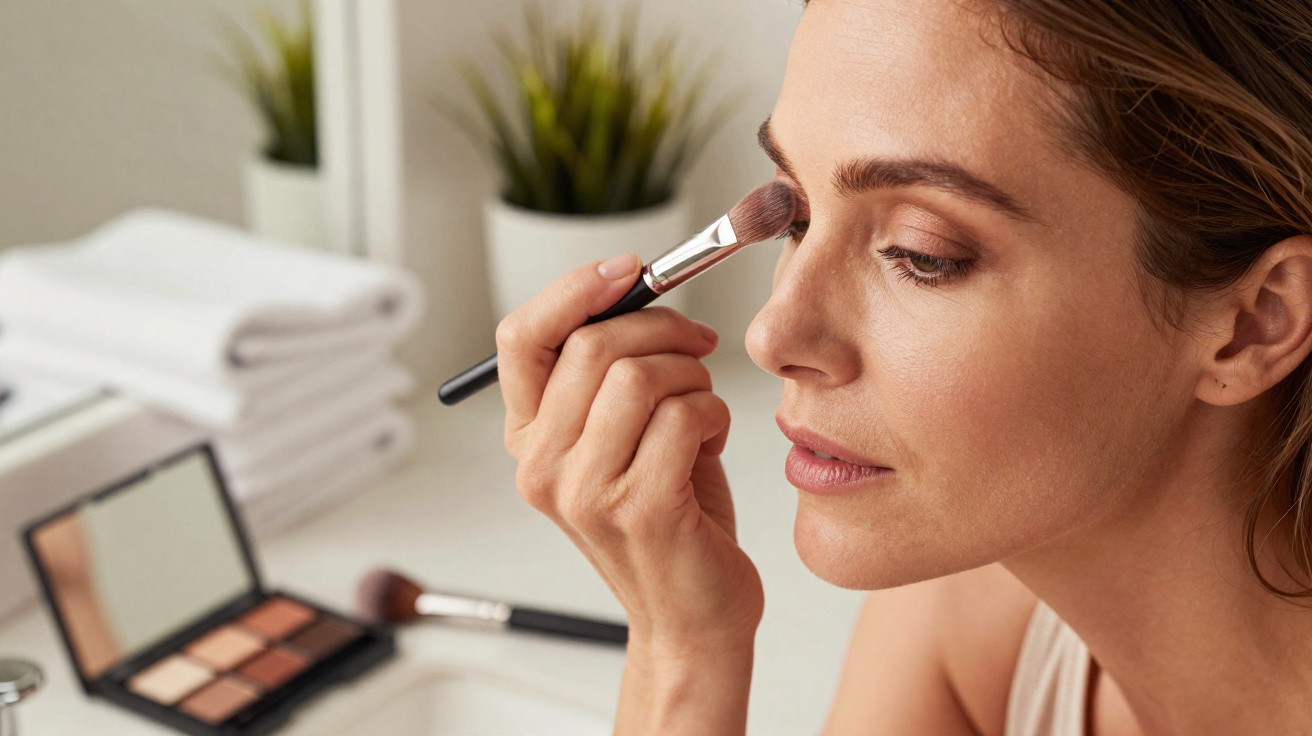
If you struggle with hooded eyelids, eye make-up can quickly feel like a losing battle. Shades disappear into the crease shadow and, instead of looking brighter, your eyes can appear more tired. There’s a straightforward pro technique that uses clever eyeshadow placement to create a lifted look in minutes - with no surgery.
What hooded eyelids visually do to your eyeshadow
Hooded eyelids aren’t unusual - they’re often simply how eyes are shaped, especially from around 50 onwards as the skin naturally loses firmness. The upper fold sits further over the mobile lid, the skin looks softer, and fine lines can appear.
That’s exactly where make-up frustrations start: you carefully apply shadow to the mobile lid, blend several shades, maybe even create a gradient - and the moment you open your eyes, almost none of that work is visible.
"The eyeshadow disappears into the shadow of the crease - and if it’s placed incorrectly, it can make the eye look heavier."
Many people notice several things happening at once:
- With eyes open, the eyeshadow is barely visible.
- Dark shades slip into fine lines and emphasise them.
- The eyes can look smaller and heavier rather than brighter.
- The natural lid shape can appear even more "droopy".
It often leads to the decision: “I’ll just stop wearing eyeshadow.” But you don’t have to - as long as you change one key thing: placement.
The most important pro trick: place eyeshadow higher than your natural crease
Make-up artists approach hooded eyelids very differently from a “classic” eye shape. Rather than following the existing crease, they create a new one visually.
The idea is simple, but extremely effective:
"The colour doesn’t go into the natural fold, but slightly above it - where you can actually see it when your eyes are open."
Instead of tracing the natural line, place the shadow a little higher. This creates the impression of a more open, lifted eye. Use your orbital bone as a guide: where you can feel it with a light sweep of your finger is generally where the colour can sit.
Step-by-step guide to the "lift effect"
- Keep your eyes open normally. Don’t lift your brows in the mirror - it makes you apply make-up for a shape you won’t have in real life.
- Use your brush while looking in the mirror to map where the colour should go. Aim for a visible area above the natural fold.
- Place the eyeshadow in a slightly raised, oval shape above the crease, not directly inside the fold.
- At the outer corner, let the shade drift gently upwards rather than dragging it down.
- Then briefly close your eyes and soften the edges with blending - the shape stays the same, it just becomes more seamless.
Used this way, eyeshadow becomes an optical “brace” that lifts the eye upwards instead of reinforcing a downward pull.
Why the right brush makes all the difference for hooded eyelids
Your tools matter almost as much as the technique. A flat, stiff brush can leave sharp edges - and on hooded eyelids that can quickly look harsh or patchy.
That’s why professionals tend to reach for one specific type: a soft, fluffy blending brush, often with a gently tapered tip.
"A light, airy brush spreads colour more like a shadow than a stripe - and that’s far more flattering on mature skin."
The best brush options at a glance
| Brush type | Suitability for hooded eyelids |
|---|---|
| Fluffy blending brush | Perfect for soft transitions, no harsh lines, ideal for the “new” crease |
| Flat eyeshadow brush | Useful for packing colour onto the mobile lid, less suitable for blending above the fold |
| Very small precision brush | Best used only in tiny areas (e.g. along the lash line), otherwise edges can look too sharp |
With a soft blending brush, build colour with gentle, sweeping motions. Rather than drawing a line, you lay down a haze of shadow where you want it, and it melds more naturally into the skin.
Which colours make the eyes look more youthful
Particularly after 50, it’s worth reconsidering your shade choices. Very glittery finishes or very deep colours tend to settle into fine lines and highlight texture.
More flattering options include:
- Silky, semi-matte shades in beige, rose, taupe or soft plum-brown.
- Mid-light tones that don’t create a harsh contrast against your skin.
- Gently satiny highlights placed right at the inner corner for a fresher look.
Very dark eyeshadow can weigh the eye down quickly when lids are hooded. If you still want depth, keep it closer to the lash line and blend it softly upwards rather than darkening a large area.
What an everyday "lifting look" actually looks like
To make the technique easier to picture, here’s a simple daytime approach that works particularly well on mature skin:
- Prep the lid: A thin layer of eyeshadow primer or a touch of concealer helps stop colour collecting in the fold.
- Light base shade: Sweep a neutral, light tone across the entire mobile lid.
- Create the “new” crease: With a mid-tone and a fluffy blending brush, work slightly above the natural fold using small circular motions.
- Lift the outer V: Angle the colour gently upwards at the outer corner - not down towards the cheek.
- Soft highlight: Place a lighter shade under the highest point of the brow, but don’t drag it all the way towards the bridge of the nose.
- Define lashes: A well-separating mascara opens the eyes further - especially on the outer third of the lashes.
If you like, you can subtly tightline the upper lashes with a soft kohl. With hooded eyelids, it usually looks more balanced when the line flicks very slightly upwards at the outer edge.
Practical extra tips for more mature eyes
Eyeshadow is only one part of the overall effect. A few small tweaks around it can make the “more youthful” impression noticeably stronger:
- Shape the brows: A slightly lifted, well-groomed brow acts like a natural frame-lift.
- Avoid overly harsh lines: For brows and eyeliner alike, smudge softly rather than drawing heavy blocks.
- Keep the lower lash line subtle: Too much darkness underneath visually drags the eye down.
- Watch texture: Creamy formulas that aren’t overly dry tend to sit more smoothly over fine lines.
If your eyelids are very sensitive or dry, introduce new products cautiously and in small amounts first. Strongly fragranced formulas can irritate delicate skin and increase redness - exactly what you’re trying to avoid with a fresh, bright look.
Why this technique suits natural ageing so well
Hooded eyelids don’t have to be seen as a flaw - they’re simply an anatomical variation, and for most people they become more pronounced over time. This eyeshadow trick works with that change rather than trying to fight it.
By placing colour where the lid space is actually visible, you deliberately outsmart the shadow created by the fold. The result is subtle but noticeable: the eyes look more open, more awake, often even friendlier. Once you’ve practised a few times, it’s easy to make it part of your everyday routine - without hours of “Instagram make-up”.
It creates a look that doesn’t try to make you appear younger than you are, but respects your natural eye shape and brings out the best in it with a handful of well-placed, simple steps.

Comments
No comments yet. Be the first to comment!
Leave a Comment